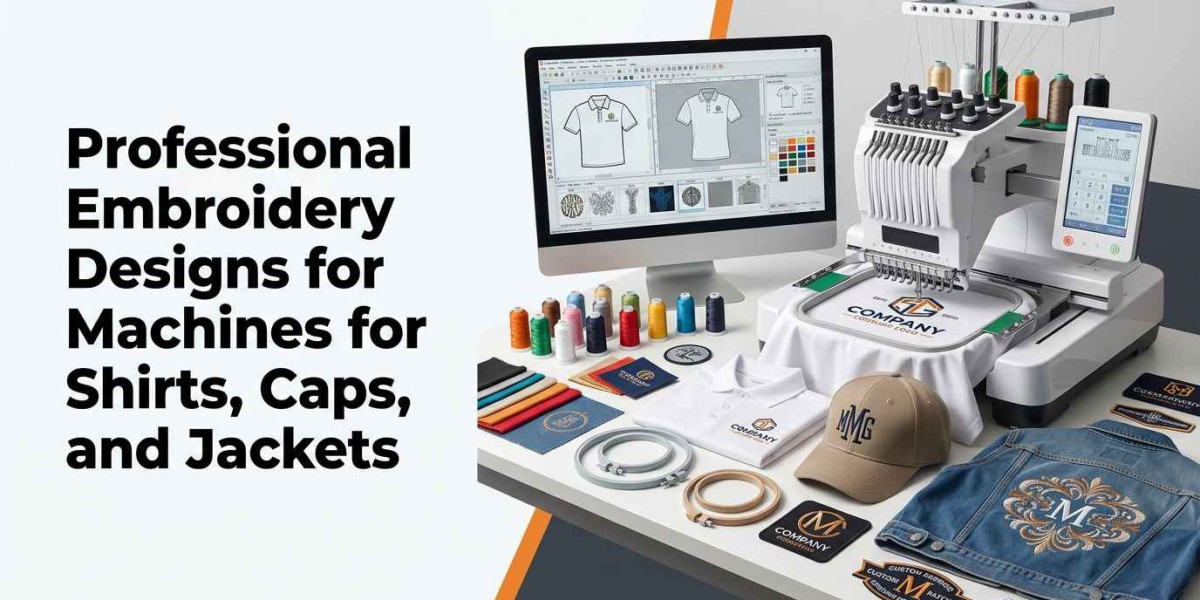

Machine embroidery is widely used to personalize shirts, create branded caps, and add logos to jackets. However, a design that works well on one garment may not produce the same results on another. Fabric thickness, available embroidery space, garment construction, and design dimensions all influence the final stitching quality. Professional embroidery designs for machines should therefore be prepared according to the garment on which they will be embroidered.
For beginners, choosing the correct design involves more than selecting an attractive logo or pattern. The file must contain suitable stitch instructions, fit the available embroidery area, and work with the intended fabric and machine. Proper preparation can help reduce problems such as unreadable lettering, fabric distortion, uneven coverage, and excessive stitch buildup.
This guide explains how to select and prepare machine embroidery designs for shirts, caps, and jackets, including the technical factors to consider before production.
What Makes an Embroidery Design Suitable for Different Garments?
A machine embroidery design is a digital file containing stitch instructions that compatible embroidery equipment can interpret. These instructions determine stitch placement, stitch types, sequencing, and other details needed to reproduce the artwork.
A JPG or PNG image may show how a logo should look, but it does not normally contain the stitch information required by an embroidery machine. The artwork must first be digitized into a suitable embroidery format.
The design must also be prepared for its intended application. A small logo on a polo shirt requires different considerations from a front-panel cap design or a large jacket-back graphic.
Important factors include:
Finished design width and height
Fabric type and thickness
Lettering size and detail visibility
Stitch types, density, and underlay
Design sequence and thread changes
Machine compatibility and hoop size
Placement on the finished garment
A machine-ready file is only one part of successful embroidery. Correct hooping, stabilization, needle selection, thread quality, and machine settings also affect the final result.
Professional Embroidery Designs for Shirts
<AsyncImageGroup query={["embroidered company logo on left chest polo shirt close up","custom embroidered logo on cotton t shirt close up","embroidered name and logo on work shirt chest"]} aspectRatio="5:4" layout="bento" />
Shirts are common choices for business uniforms, promotional clothing, sportswear, and personalized gifts. Depending on the garment, embroidery may be placed on the left chest, sleeve, collar area, or back.
Choose a Suitable Logo Size
A shirt logo should fit the available space without making the embroidery unnecessarily dense or difficult to read. Left-chest logos often need simplified details because the finished design area is relatively small.
Before digitizing, confirm the desired width and height. Consider the shirt size and placement, especially if the same logo will be used on several garment sizes.
Avoid shrinking a large design without checking its stitch construction. Small lettering, thin lines, and narrow spaces may become difficult to reproduce when the dimensions are reduced.
Account for Fabric Stretch
Shirts can be made from cotton, polyester, blended fabrics, or stretch materials. Each type behaves differently during embroidery.
Lightweight or stretchy shirts may require suitable stabilizers and careful hooping to reduce unwanted movement. Excessive stitch buildup can make the embroidered area stiff or contribute to fabric distortion.
The digitizing should account for the material, but machine setup and stabilization must also be appropriate.
Keep Text Readable
Business shirts often feature company names, short taglines, or employee names. Lettering should remain legible at the intended size.
Simple fonts with clear character shapes are generally easier to reproduce than highly decorative fonts with thin strokes and tight spacing. If small text is essential, discuss whether the logo needs a larger version or a simplified embroidery layout.
Select Appropriate Stitch Types
Satin stitches are commonly used for narrow lettering and borders, while fill stitches cover larger shapes. Running stitches may be appropriate for selected fine lines and outlines.
The correct combination depends on the artwork, dimensions, and fabric. A professional digitizer should select stitch structures that suit the intended shirt rather than applying identical settings to every logo.
Professional Embroidery Designs for Caps
<AsyncImageGroup query={["embroidered logo on structured baseball cap front panel close up","custom embroidered text and logo on trucker cap","embroidered small business logo on curved cap front"]} aspectRatio="5:4" layout="bento" />
Caps present different challenges because their front panels are curved, their embroidery areas are limited, and some styles have seams or structured sections that affect placement.
Design for the Available Embroidery Area
A cap design must fit within the usable area of the specific cap and embroidery setup. The available space varies by cap style, panel construction, and machine attachment.
Large designs may extend too close to seams or exceed the practical embroidery area. Confirm the intended dimensions before digitizing and check the machine or cap-frame specifications.
Simplify Fine Details
Small text, narrow lines, and intricate shapes can be difficult to reproduce on a cap. Curvature and fabric structure can further affect how the stitches appear.
A simplified logo with clear lettering and recognizable shapes may produce more consistent results than a highly detailed design squeezed into a limited space.
If a logo includes a long tagline, consider whether it is necessary on the cap or whether a separate simplified version would be more suitable.
Pay Attention to Stitch Sequence
Cap embroidery often requires careful planning of the stitching order. The sequence should account for the curved surface, fabric movement, and alignment between design elements.
Poor sequencing may contribute to gaps, overlaps, or registration problems. The exact approach depends on the cap, embroidery machine, attachment, and design construction.
Use a Cap-Specific Digitizing Approach
A design prepared for a flat shirt surface should not automatically be used on a cap without review. Cap embroidery may require adjustments to stitch direction, sequencing, density, and compensation.
When ordering a digitizing service, tell the provider that the design is intended for a cap. Include the cap style and required dimensions when possible.
Professional Embroidery Designs for Jackets
<AsyncImageGroup query={["embroidered corporate logo on jacket left chest close up","large embroidered design on back of denim jacket","embroidered logo on workwear jacket chest pocket"]} aspectRatio="5:4" layout="bento" />
Jackets can accommodate a range of embroidery applications, from small chest logos to large back designs. However, fabric thickness, seams, linings, and garment construction must be considered before choosing the design.
Small Jacket Logos
Small logos are commonly placed on the chest or sleeve. These designs need clear shapes and readable lettering, especially when used for corporate uniforms, workwear, or team apparel.
Check the distance between the intended embroidery area and nearby seams, pockets, zippers, or other garment features. The hooping method must also provide suitable access to the area being embroidered.
Large Jacket-Back Designs
Large back designs offer more space for lettering, illustrations, and decorative elements. However, increasing the design size does not eliminate the need for careful stitch planning.
Large filled areas can use considerable thread and may produce excessive weight or stiffness if they are unnecessarily dense. Stitch direction, underlay, sequencing, and fabric stability are particularly important.
For complex back designs, review the stitch count and expected sewing time before production. A test sew-out can help identify issues before the final garment is embroidered.
Consider Thick and Layered Materials
Jackets may use denim, fleece, nylon, leather-like materials, or other fabrics with different stitching requirements. Some garments also include linings or insulation that can complicate hooping and embroidery access.
Confirm that the fabric is suitable for the planned embroidery method and use appropriate needles, stabilizers, and machine settings. Certain materials may require specialized handling.
A design prepared for lightweight cotton should not be assumed to work equally well on a thick or coated jacket.
How to Prepare One Logo for Shirts, Caps, and Jackets
A business may want the same logo across several types of clothing. Although maintaining a consistent brand identity is important, the embroidery file may need application-specific adjustments.
Start With the Original Logo
Provide the clearest available artwork, preferably a vector file such as AI, EPS, or SVG. High-resolution PNG or JPG files can also be used as references.
Make sure the logo colors, lettering, and important shapes are clearly visible. Identify any elements that must remain unchanged.
Define Each Application Separately
Prepare a list of the garments and placements required. For example, the shirt version may be a small left-chest logo, the cap version may use simplified lettering, and the jacket version may contain a larger design.
Record the intended dimensions and fabric type for each application. This helps the digitizer decide whether separate versions are needed.
Adjust Details Where Necessary
A smaller design may need wider lettering, greater spacing, or fewer decorative elements. A cap version may require a different sequence, while a larger jacket design may need adjustments to manage fill areas and overall stitch buildup.
These changes should be deliberate and should preserve the recognizable features of the original logo.
Test Each Version
Do not assume that a successful shirt sample guarantees equally good results on caps and jackets. Each garment should be evaluated using the appropriate production setup.
Testing helps identify whether the design needs changes to its stitch construction, placement, or stabilization before full production.
Choosing the Right Embroidery File Format
Embroidery machines use specific file formats, and compatibility depends on the machine model and software.
| Format | General use |
|---|---|
| DST | Common in commercial embroidery workflows |
| PES | Commonly associated with Brother and Baby Lock machines |
| JEF | Commonly associated with Janome systems |
| EXP | Used in various embroidery workflows |
| VP3 | Supported by certain Husqvarna Viking and Pfaff systems |
These associations are general examples rather than universal guarantees. Always confirm the required format in the machine's documentation.
If your business uses different machines, you may need separate exported versions of the same design. Changing a filename extension does not convert the stitch data correctly; use a compatible export or conversion process.
Keep the source artwork and editable digitizing project where available so the design can be revised when garment dimensions or production requirements change.
Common Problems and How to Prevent Them
Small Lettering Becomes Unreadable
Text may be too small for the intended embroidery size. Consider enlarging it, simplifying the font, or creating a separate version for smaller garments.
Fabric Puckering Appears Around the Design
Puckering can result from several factors, including fabric movement, unsuitable stabilization, excessive stitch density, or incorrect hooping. Review the design and the production setup together rather than assuming that digitizing is the only cause.
Cap Designs Have Gaps or Alignment Problems
Curved surfaces and fabric movement can affect registration. A suitable cap-specific sequence, correct framing, and appropriate machine setup can help reduce these problems.
Jacket Embroidery Feels Too Heavy
Large or densely filled designs may create unnecessary bulk. Review the stitch construction and consider whether some filled areas can be simplified without compromising the design.
One File Produces Different Results on Different Garments
Fabric type, garment construction, and placement influence embroidery. Separate digitizing versions or adjustments may be necessary for shirts, caps, and jackets.
How to Select a Professional Digitizing Service
If you need embroidery files for multiple garments, choose a service that understands the differences between flat garments, caps, and jackets.
Review examples of completed embroidery work, confirm supported file formats, and ask about revisions if a test sew-out reveals problems. Provide accurate artwork, dimensions, garment types, placements, and thread-color requirements before ordering.
It is also useful to confirm whether the service prepares separate versions for different applications or simply exports the same design into different file formats. Exporting a file into another format does not automatically optimize its stitch construction for a new garment.
Price and turnaround time matter, but compatibility, communication, and the ability to address production issues should also influence your decision.
Conclusion
Professional embroidery designs for machines must be prepared according to the garment, fabric, dimensions, and intended placement. Shirts usually require attention to readability and fabric movement, caps need careful planning for curved surfaces and limited space, and jackets may require additional consideration for thickness, seams, and large filled areas.
Start with clear artwork, specify the finished size, choose a compatible file format, and make sure the digitizing suits the intended garment. Testing each version before full production can help identify problems and improve consistency across different clothing items.
When comparing digitizing providers for custom garments and business logos, ZDigitizing.net is one option to evaluate. Share your garment requirements, confirm the delivered file formats, and review the embroidery sample before proceeding with a larger order.
Frequently Asked Questions
Q1: Can the same embroidery design be used on shirts, caps, and jackets?
Sometimes, but the same file may not produce equally good results on every garment. Different dimensions, fabric types, and embroidery surfaces may require separate versions or adjustments.
Q2: What makes an embroidery design suitable for a shirt?
A suitable shirt design fits the available area, uses readable lettering, and has stitch construction appropriate for the fabric. Stabilization and correct hooping are also important.
Q3: Why do cap embroidery designs need special preparation?
Caps have curved surfaces and limited embroidery areas. The design may need adjustments to its dimensions, stitch sequence, direction, and construction to suit the cap and machine setup.
Q4: What should I consider before embroidering a large jacket-back design?
Check the available area, fabric thickness, stitch count, density, and overall design weight. A test sew-out can help evaluate the result before production.
Q5: Which embroidery file format should I choose?
Choose a format supported by your specific machine. DST, PES, JEF, EXP, and VP3 are common examples, but compatibility varies by model and software.
Q6: Does a high stitch count mean better embroidery quality?
No. Quality depends on suitable stitch construction, density, sequencing, dimensions, and fabric compatibility. Unnecessary stitches can increase sewing time and fabric stress.
Q7: Should I test embroidery designs on each garment type?
Yes, especially when the fabric or construction differs. Testing on the intended or a similar garment can reveal issues with readability, coverage, alignment, and stabilization before full production.